Databinding in LiveCode Create
Databinding is a powerful feature in LiveCode Create that allows you to connect Collections or Dataviews to objects and containers. This enables dynamic data display and interaction within your app without requiring manual updates or scripting.
This guide explains how databinding works, how to bind data to objects and containers, and best practices for working efficiently with databinding.
What is Databinding?
Databinding connects your app's interface to data from the Datastore. This can be done using:
- Collections: Complete datasets stored in your app.
- Dataviews: Filtered and sorted subsets of Collections.
By binding data to objects (e.g., Lists, Tables, Input Fields) or containers, you ensure your app always displays the latest data dynamically.
Key Benefits of Databinding:
- Automatically updates the UI when underlying data changes.
- Reduces the need for manual coding to display and refresh data.
- Simplifies data management across objects and layouts.
Types of Databinding
You can bind data to the following:
- Objects: Widgets like Lists, Tables, and Input Fields.
- Containers: Layout Containers or Responsive Layout Containers.
When you bind data to a container, all child objects inside that container inherit the data binding automatically. However, this inheritance can be overwritten at the object level if needed.
Accessing the Databinding Panel
To set up databinding:
- Select an object or container on the canvas.
- Open the Property Inspector.
- Navigate to the Data Tab.
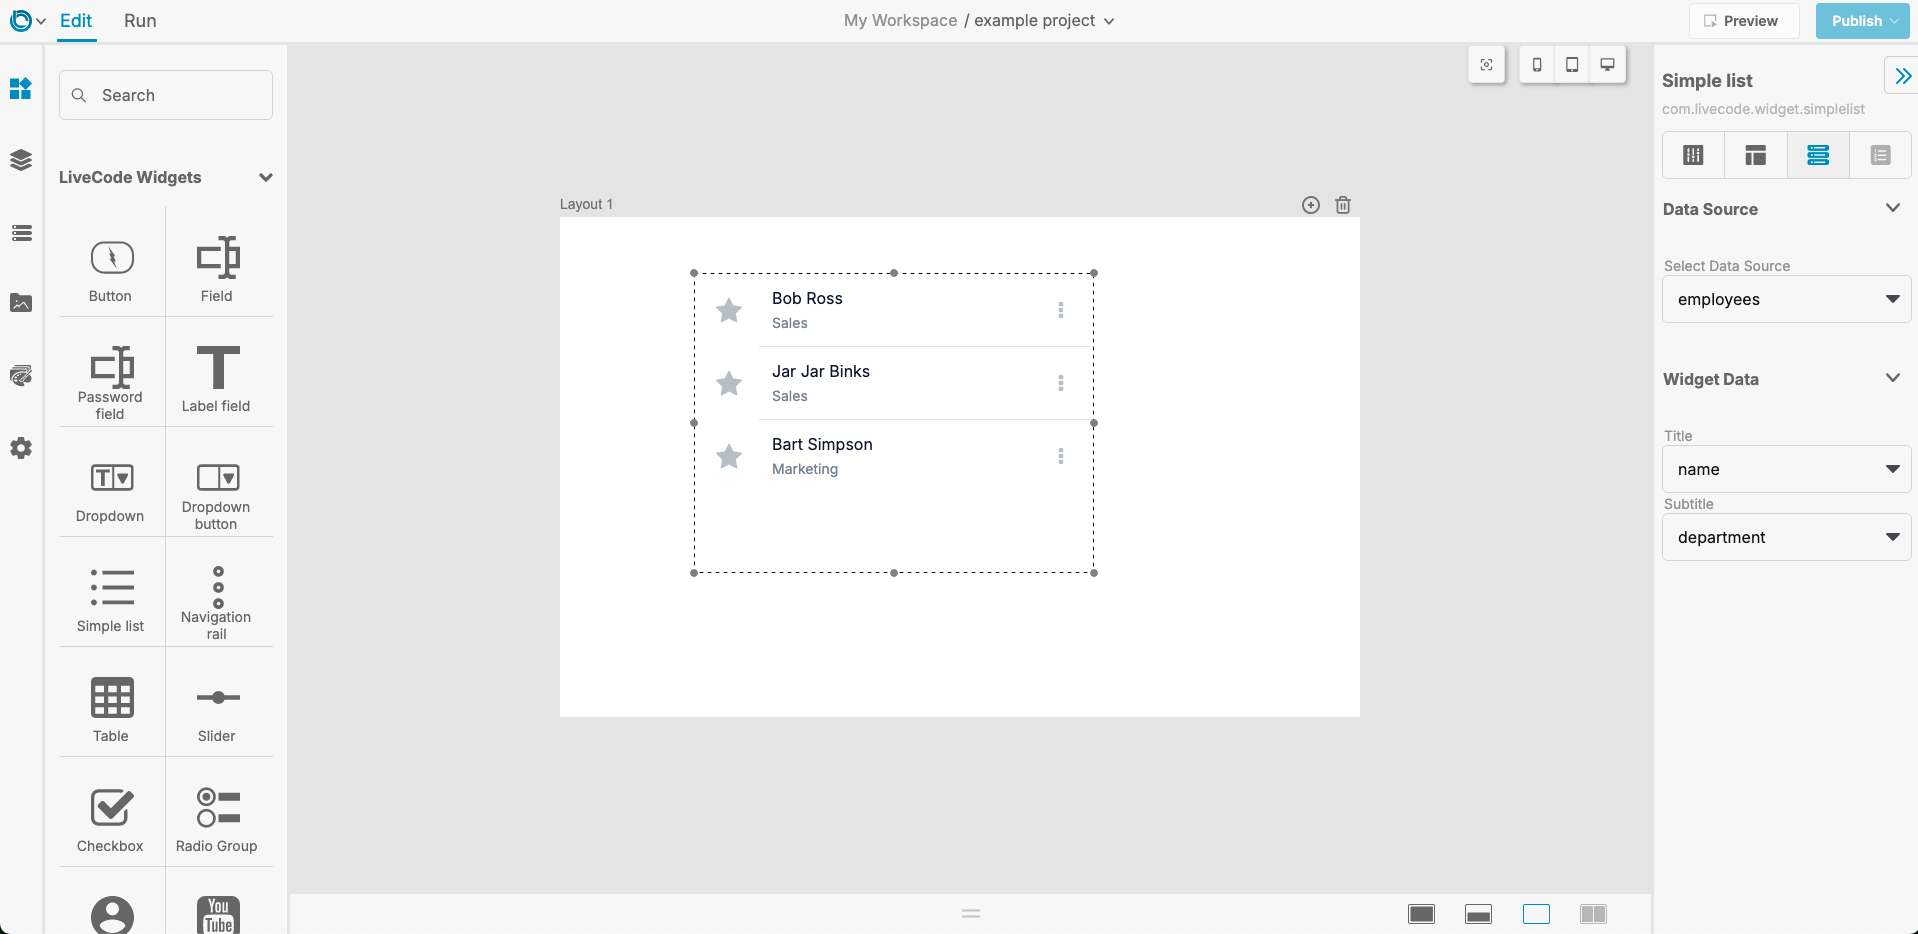
- Use the Bind Data dropdown to connect a Collection or Dataview.
- Map parts of the object to fields of the Collection or Dataview.

Testing Your Databinding
Once you’ve set up databinding:
- Switch to Run Mode: Test your app to ensure the data displays correctly.
- Modify Records: Add, update, or delete records in the bound Collection.
- Changes at the Collection level will automatically reflect in the UI.
For further learning: